1. 简介 首次通过Hexo和Github搭建自己的博客,尝试成功,从别人那里借来个yilia主题,看着挺漂亮,索性直接当我的主题用了,虽然还不会太多的配置操作,先把自己搭建博客过程中的主要操作记录下来。
环境简介 本地电脑环境:
windows10
搭建博客需要安装的软件:
git
安装搭建博客需要的工具:git和node.js;通过一下命令查询:
1
2
# git --version git version 2.22.0.windows.1
1 # npm config set registry https://registry.npm.taobao.org
默认已经注册有Github帐号;
Hexo软件还未安装,下文会简单讲述Hexo软件的安装;
2. Github仓库创建和配置 2.1 创建Git仓库 打开GitHub,点击“New repository”,创建一个新仓库,用来专门存放博客日志信息;仓库名要按照格式:账户名.github.io,比如:Mshrimp.github.io;否则,后边的操作会出现问题;创建仓库时勾选上“
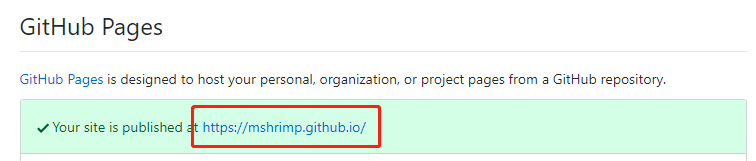
进入创建好的仓库Mshrimp.github.io,点击右侧的“Settings”,向下拉找到Github Pages,会看到网站是:https://mshrimp.github.io/,点击就可以访问,也可以通过外网访问,这时这个博客项目已经部署到网站上了,但是是个空的网站,没有内容;这个网址是博客的默认地址,如果有兴趣可以自己购买域名换成想要的地址。
2.2 配置git仓库 如果是第一次使用git,就需要先配置git环境,否则可以跳过;
1
2
# git config --global user.name "Mshrimp" # git config --global user.email "******@outlook.com"
在没有配置git环境之前,~/.ssh是不存在的
1
2
# cd ~/.ssh bash: cd: /c/Users/Kevin-TP/.ssh: No such file or directory
使用ssh-keygen生成私钥和公钥
1 2 3 4 5 6 7 8 9 10 11 12 13 14 15 16 17 18 19 20 21 22 # ssh-keygen -t rsa -C "chiyuan.ma@outlook.com" Generating public/private rsa key pair. Enter file in which to save the key (/c/Users/Kevin-TP/.ssh/id_rsa): Created directory '/c/Users/Kevin-TP/.ssh'. Enter passphrase (empty for no passphrase): Enter same passphrase again: Your identification has been saved in /c/Users/Kevin-TP/.ssh/id_rsa. Your public key has been saved in /c/Users/Kevin-TP/.ssh/id_rsa.pub. The key fingerprint is: SHA256:pHNkvs9RsOToxmFH6gnkOb7j/dlRSc4c6TkOvGQ6fcc chiyuan.ma@outlook.com The key's randomart image is: +---[RSA 3072]----+ | | | . | | . + + + | | o B * + * + | | B S + * X | | . X = * = o | | . B + + o E| | .+ o = o . | | .o...= . | +----[SHA256]-----+
从以上的操作打印可以知道,生成的密钥和公钥的保存路径
1 2 Your identification has been saved in /c/Users/Kevin-TP/.ssh/id_rsa. Your public key has been saved in /c/Users/Kevin-TP/.ssh/id_rsa.pub.
查看生成的密钥和公钥
1 2 3 4 5 6 # cd ~/.ssh # ls id_rsa id_rsa.pub # cat id_rsa.pub ssh-rsa ......
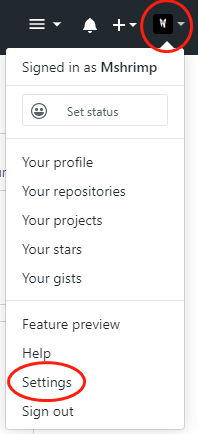
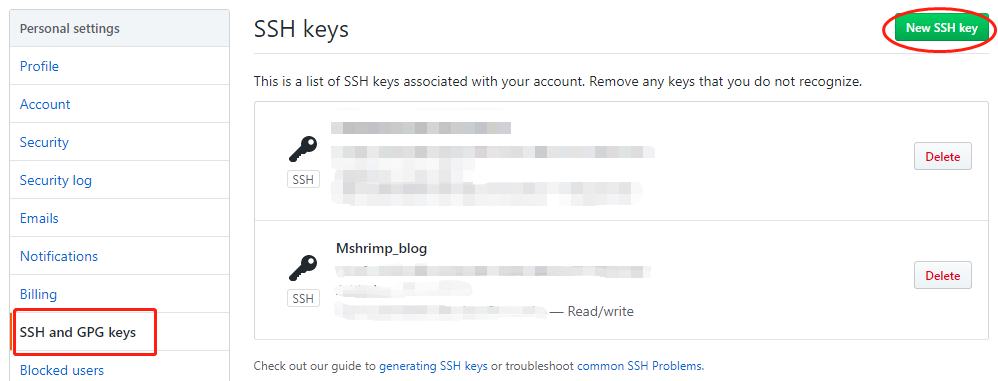
2.3 把本地公钥添加到github中 在GitHub中,点击右侧图像下拉选项,选择“Settings”,在“SSH and GPG keys”中,点击“New SSH key”,并将~/.ssh/id_rsa.pub文件里的内容复制上去,保存退出;
使用“ssh -T git@github.com ”命令,测试添加ssh是否成功;
1 2 3 # ssh -T git@github.com ...... Hi Mshrimp! You've successfully authenticated, but GitHub does not provide shell access.
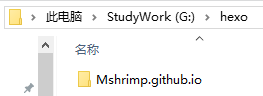
3. Node安装 4. Hexo安装及配置 先创建一个hexo操作的文件目录
如果使用的是Linux系统,可以直接在命令行中输入命令操作,如果是windows系统,用管理员权限打开“命令提示符”,使用命令在电脑上安装hexo;或者,在hexo目录上右键,选择“Git Bash Here”,用git bash工具打开hexo目录,在git bash中使用命令操作;
4.1 安装hexo 1 2 3 4 5 6 7 8 9 10 11 12 13 14 15 16 17 18 # npm install hexo -g C:\Users\Kevin-TP\AppData\Roaming\npm\hexo -> C:\Users\Kevin-TP\AppData\Roaming\npm\node_modules\hexo\bin\hexo npm WARN optional SKIPPING OPTIONAL DEPENDENCY: fsevents@2.1.2 (node_modules\hexo\node_modules\fsevents): npm WARN notsup SKIPPING OPTIONAL DEPENDENCY: Unsupported platform for fsevents@2.1.2: wanted {"os":"darwin","arch":"any"} (current: {"os":"win32","arch":"x64"}) npm WARN optional SKIPPING OPTIONAL DEPENDENCY: fsevents@1.2.11 (node_modules\hexo\node_modules\nunjucks\node_modules\fsevents): npm WARN notsup SKIPPING OPTIONAL DEPENDENCY: Unsupported platform for fsevents@1.2.11: wanted {"os":"darwin","arch":"any"} (current: {"os":"win32","arch":"x64"}) + hexo@4.2.0 added 36 packages from 40 contributors, removed 30 packages, updated 58 packages and moved 5 packages in 19.178s
检查hexo是否安装成功
1 2 3 4 5 6 7 8 9 10 11 12 13 14 15 16 17 18 # hexo -v hexo-cli: 2.0.0 os: Windows_NT 10.0.18362 win32 x64 http_parser: 2.8.0 node: 10.16.0 v8: 6.8.275.32-node.52 uv: 1.28.0 zlib: 1.2.11 brotli: 1.0.7 ares: 1.15.0 modules: 64 nghttp2: 1.34.0 napi: 4 openssl: 1.1.1b icu: 64.2 unicode: 12.1 cldr: 35.1 tz: 2019a
4.2 初始化hexo文件夹 1 2 3 4 5 6 7 8 9 10 11 12 13 14 15 16 17 18 19 20 21 22 23 24 25 26 27 # hexo init INFO Cloning hexo-starter https://github.com/hexojs/hexo-starter.git Cloning into 'G:\hexo_git'... remote: Enumerating objects: 9, done. remote: Counting objects: 100% (9/9), done. remote: Compressing objects: 100% (7/7), done. remote: Total 77 (delta 4), reused 5 (delta 2), pack-reused 68 Unpacking objects: 100% (77/77), done. Submodule 'themes/landscape' (https://github.com/hexojs/hexo-theme-landscape.git) registered for path 'themes/landscape' Cloning into 'G:/hexo_git/themes/landscape'... remote: Enumerating objects: 33, done. remote: Counting objects: 100% (33/33), done. remote: Compressing objects: 100% (29/29), done. remote: Total 929 (delta 12), reused 15 (delta 3), pack-reused 896 Receiving objects: 100% (929/929), 2.56 MiB | 9.00 KiB/s, done. Resolving deltas: 100% (492/492), done. Submodule path 'themes/landscape': checked out '73a23c51f8487cfcd7c6deec96ccc7543960d350' INFO Install dependencies npm WARN deprecated core-js@1.2.7: core-js@<2.6.8 is no longer maintained. Please, upgrade to core-js@3 or at least to actual version of core-js@2. npm notice created a lockfile as package-lock.json. You should commit this file. npm WARN optional SKIPPING OPTIONAL DEPENDENCY: fsevents@1.2.9 (node_modules\fsevents): npm WARN notsup SKIPPING OPTIONAL DEPENDENCY: Unsupported platform for fsevents@1.2.9: wanted {"os":"darwin","arch":"any"} (current: {"os":"win32","arch":"x64"}) added 340 packages from 500 contributors and audited 6879 packages in 29.578s found 0 vulnerabilities INFO Start blogging with Hexo!
看到“Start blogging with Hexo!”打印,说明初始化完成;
输入npm install,安装所需要的组件
hexo已经安装并初始化完成;
1 2 # ls _config.yml node_modules/ package.json package-lock.json scaffolds/ source/ themes/
到此,hexo环境安装完成。
4.3 Hexo操作 1 2 3 # hexo g # hexo s // 默认情况下,访问网址为: [http://localhost:4000/]
在浏览器地址栏输入“http://localhost:4000/”打开页面,是一个空的博客网页;
4.4 将git库和hexo链接起来 配置Deployment
在hexo文件夹中,找到_config.yml文件,修改repository值(在末尾),repository值是github项目里的ssh;
1 2 3 4 deploy: type: git repository: git@github.com:Mshrimp/Mshrimp.github.io.git branch: master
HexoBlog部署到git,需要安装hexo-deployer-git插件,在blog目录下运行以下命令进行安装;
1 2 3 4 5 6 7 8 # npm install hexo-deployer-git --save npm WARN babel-eslint@10.1.0 requires a peer of eslint@>= 4.12.1 but none is installed. You must install peer dependencies yourself. + hexo-deployer-git@1.0.0 added 1 package from 1 contributor, removed 4 packages and updated 14 packages in 5.684s
修改根目录下_config.yml文件后,需要使用$ hexo deploy部署一下,否则修改内容不会生效;
至此,一个空的博客已经搭建完成,下一步,添加博客文章;
5. 创建博客文章 1 # hexo new [layout] <title>
1 2 3 // 创建博客:hello-world # hexo new post hello-world INFO Created: G:\hexo\source\_posts\hello-world.md
创建成功后,会在source/_posts/目录生成hello-world.md文件;
使用编辑器,编辑好hello-world.md文件的内容后,开始在博客中展示;
生成静态文件
1
2
3
4
5
6
7
8
9
10
11
12
13
14
15
16
17
18
19
20
21
22
# hexo g INFO Start processing INFO Files loaded in 757 ms INFO Generated: archives/2019/index.html INFO Generated: archives/index.html INFO Generated: archives/2019/07/index.html INFO Generated: 2019/07/16/hello-world/index.html INFO Generated: index.html INFO Generated: fonts/iconfont.b322fa.eot INFO Generated: fonts/default-skin.b257fa.svg INFO Generated: fonts/tooltip.4004ff.svg INFO Generated: img/preloader.gif INFO Generated: fonts/iconfont.16acc2.ttf INFO Generated: fonts/iconfont.8c627f.woff INFO Generated: fonts/iconfont.45d7ee.svg INFO Generated: img/default-skin.png INFO Generated: img/scrollbar_arrow.png INFO Generated: slider.e37972.js INFO Generated: main.0cf68a.css INFO Generated: main.0cf68a.js INFO Generated: mobile.992cbe.js INFO 18 files generated in 784 ms
1 2 3 # ls _config.yml node_modules/ package-lock.json scaffolds/ themes/ db.json package.json public/ source/
启动服务器,通过浏览器打开http://localhost:4000查看博客文件效果
1
2
3
# hexo s INFO Start processing INFO Hexo is running at http://localhost:4000 . Press Ctrl+C to stop.
在确定博客文件完成之后,提交博客文件到git库保存
或者直接生成、提交一起操作
如果执行过程中出现异常,可以先清楚,再生成、提交
1 2 3 # hexo clean INFO Deleted database. INFO Deleted public folder.
提交之后的博客文件,就可以通过浏览器打开git库名称:mshrimp.github.io来打开了,支持外网访问;
至此,一篇博客文件已经生成;
Hexo常用命令 hexo的命令很简单,以下几个是很常用的hexo命令,这些命令需要在当前blog目录下执行
1 hexo new [layout] <title> #新建文章
新建文章时可以指定文章的布局(layout),默认为post,可以通过修改_config.yml中的default_layout: post来指定默认布局;这样创建的文章都会以md格式保存在source/_post目录中;
1 2 3 4 hexo g #generate 生成静态文件 hexo s #server 启动服务器。在本地预览效果,默认情况下,访问网址为:http://localhost:4000/ hexo d #deploy 部署网站同步到github。部署网站前,需要预先生成静态文件 hexo clean #clean 清除缓存文件 (db.json) 和已生成的静态文件 (public)。
6. 更换主题 不喜欢原来自带的主题,找了一个比较好看的yilia主题,需要先Github中将yilia主题的源码下载到博客目录的themes目录下;
1 # git clone https://github.com/litten/hexo-theme-yilia.git themes/yilia
在博客根目录下,修改_config.yml文件的themes:
这个主题中的一些配置,可以根据需要自行修改,配置文件为themes/yilia/_config.yml;
7. 参考文章 https://www.jianshu.com/p/1bcad7700c46
https://segmentfault.com/a/1190000017986794